
This post will cover how to take off the OEM Headlights, Tail fairings and Upper/lower fairings from the Kawasaki Ninja 400. This may be helpful if you want to change the front turn signals for flush mount turn signals, Install race bodywork, change the oil, or just repair crash damage. If you’re doing an oil change, always remember to put some cardboard down so you don’t get oil everywhere!
Tools Required:
4mm allen/hex
8mm socket
10mm socket
Phillip’s head screwdriver
Small pick tool for releasing wire connectors and plastic pin clips
Step 1
Removal of passenger seat and main/pilot seat Insert ignition key below passenger seat to release seat:

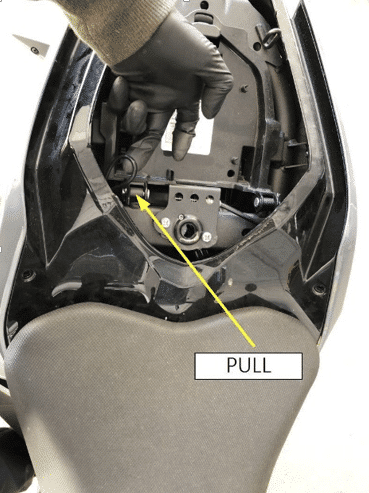
Once Passenger seat is removed; Pull the release cable to release the main seat and lift the seat off
Now that both seats are removed we can start disassembling the tails section:
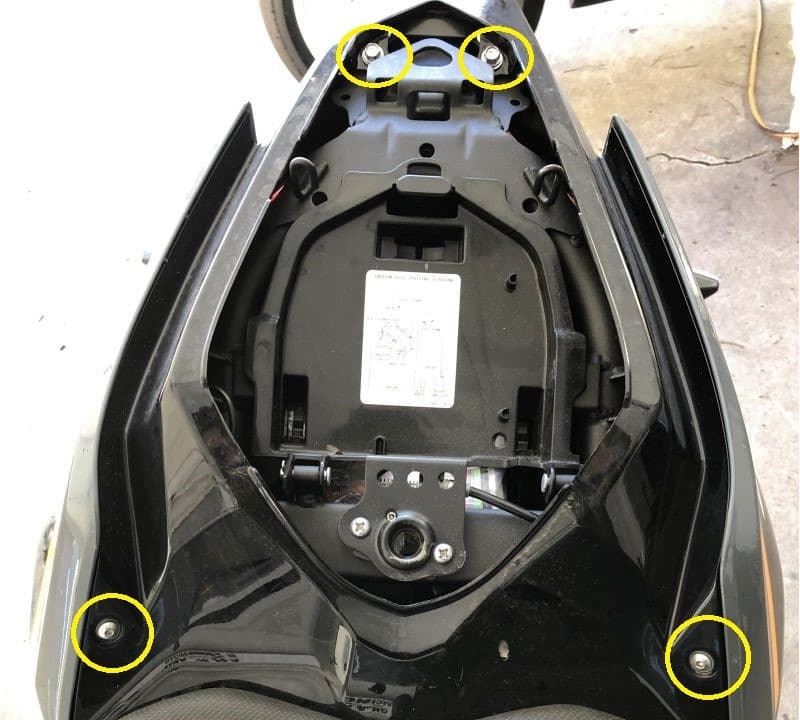
Start by removing the 4 bolts that are visible around the passenger seat; Two other bolts are underneath the pilot seat
Removing a total of 6 bolts
Next, remove the two side pieces, we recommend starting with the right side panel because it doesn’t have the key hole in it for the rear seat:
Remove two bolts underneath the side tail panels

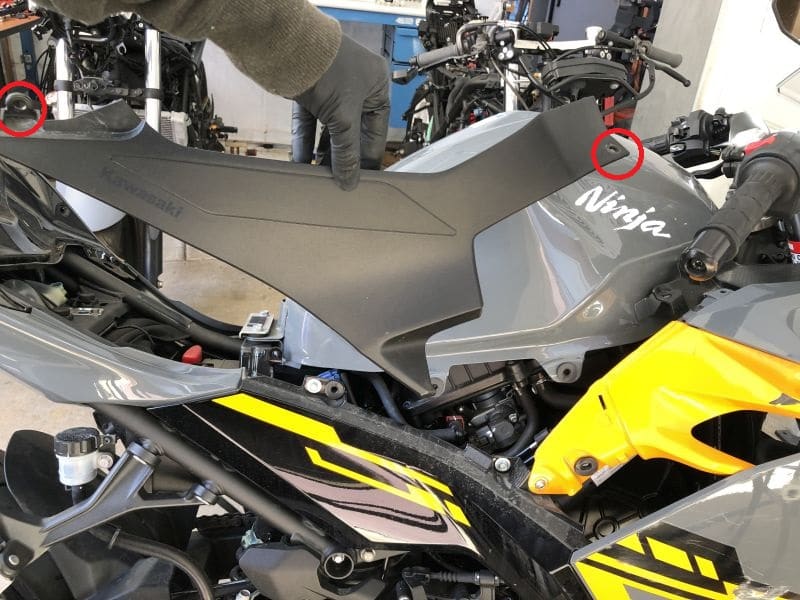
Remove two bolts from the black plastic side panels by the rear of the gas tank.
Remove the bolts from the front of this black plastic side panel, then pull the panel off. It takes some force because there are 4 plastic pins that must be pulled straight out from their rubber grommets:
Once you have removed both panels
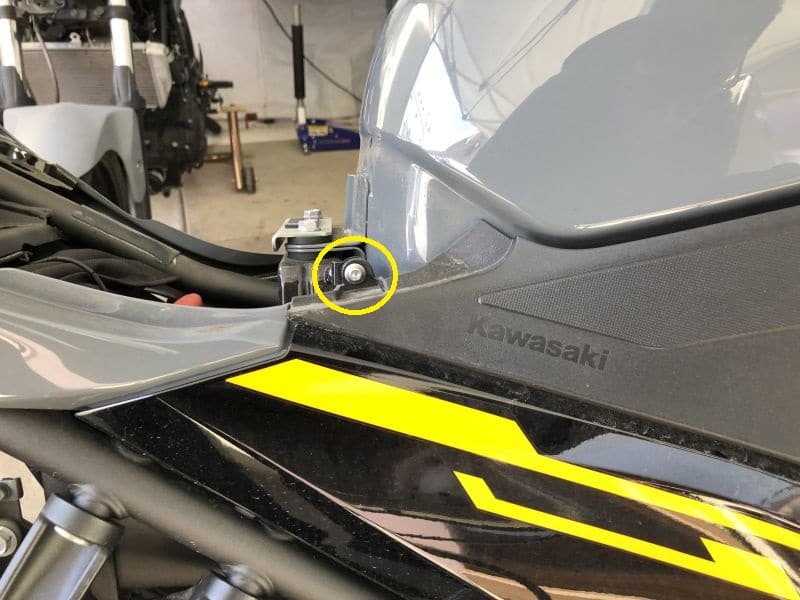
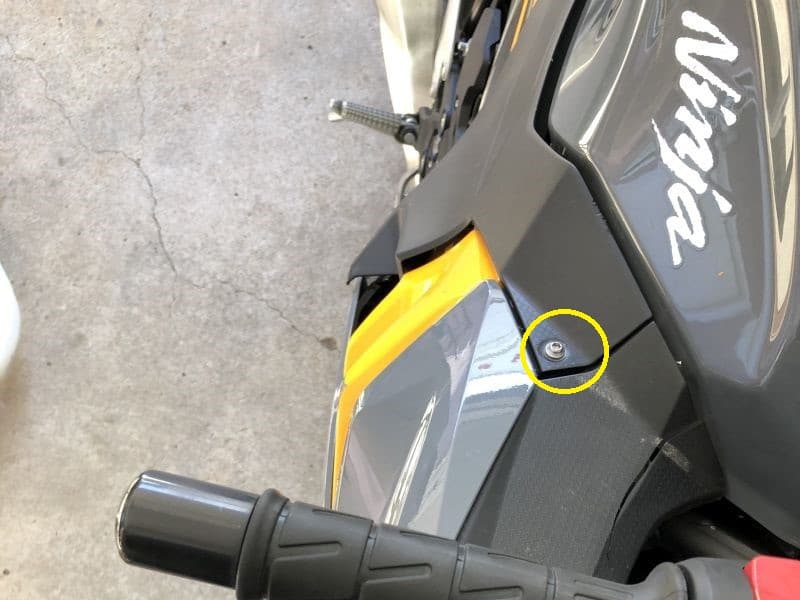
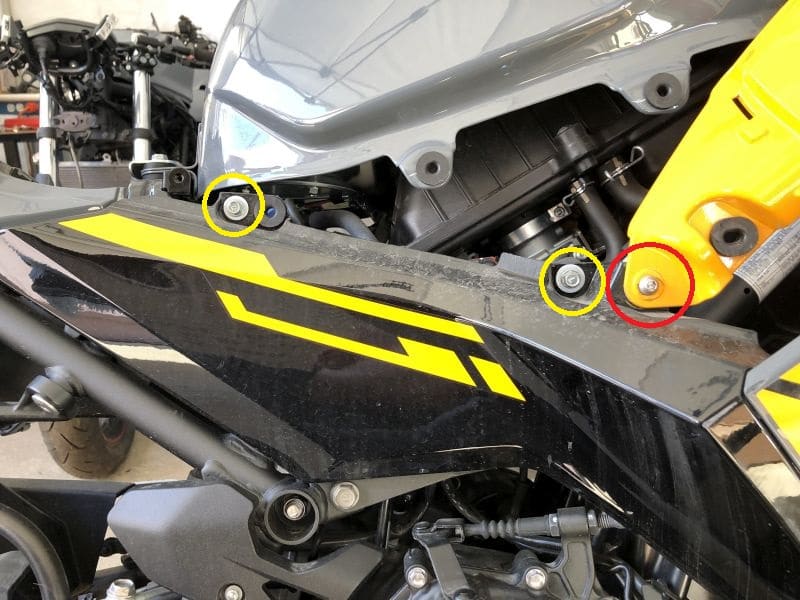
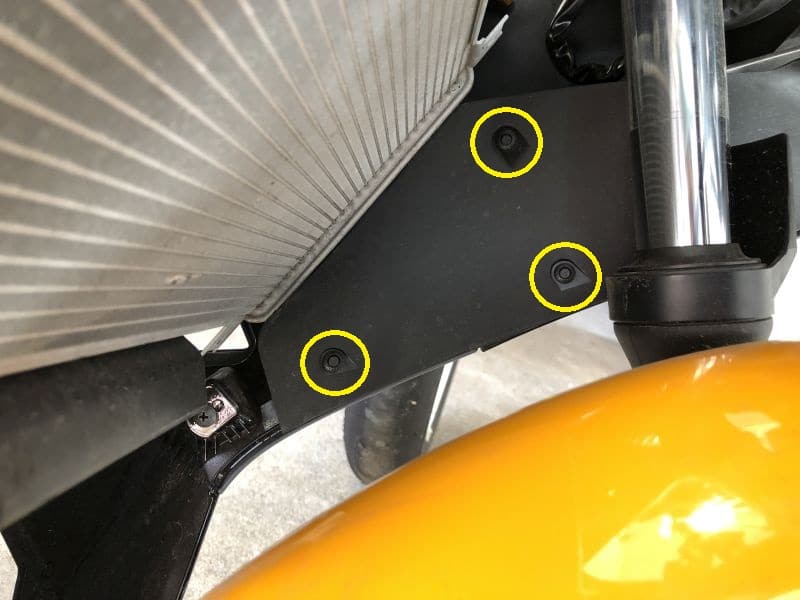
Remove the bolts circled Yellow; The red one can also be removed, but it’s part of the front side fairings.
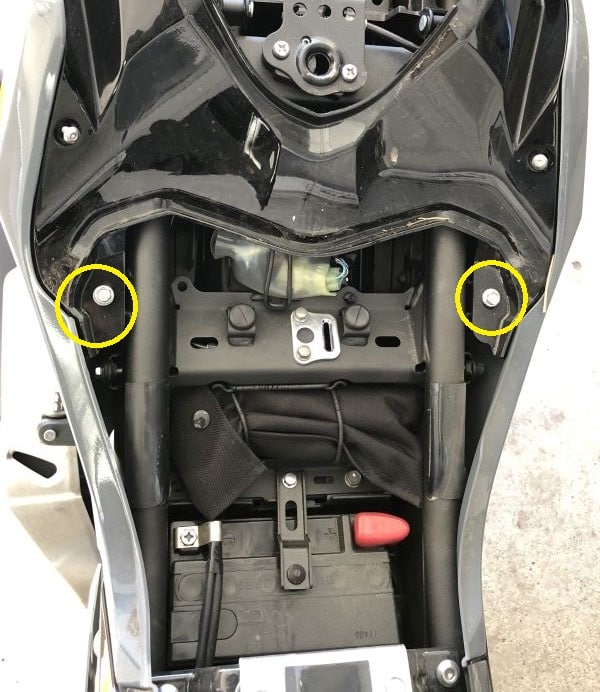
Now that you have removed those bolts you have exposed this area, remove this bolt circled in yellow:

Once that bolt has been removed, pull the panel straight out to pull the plastic pins from their rubber grommets:

The left side with the key release can be a little tricky, I suggest pulling it and rotating the panel until the wire lines up with the gap; once you have you can then slip the wire out easily.


Now that the side tail panels have been remove it exposes plastic clips and a bolt on both sides. The plastic clips are removed by pressing the center in until it clicks to release the tabs, I like to use a small pick tool to carefully press the center pin:
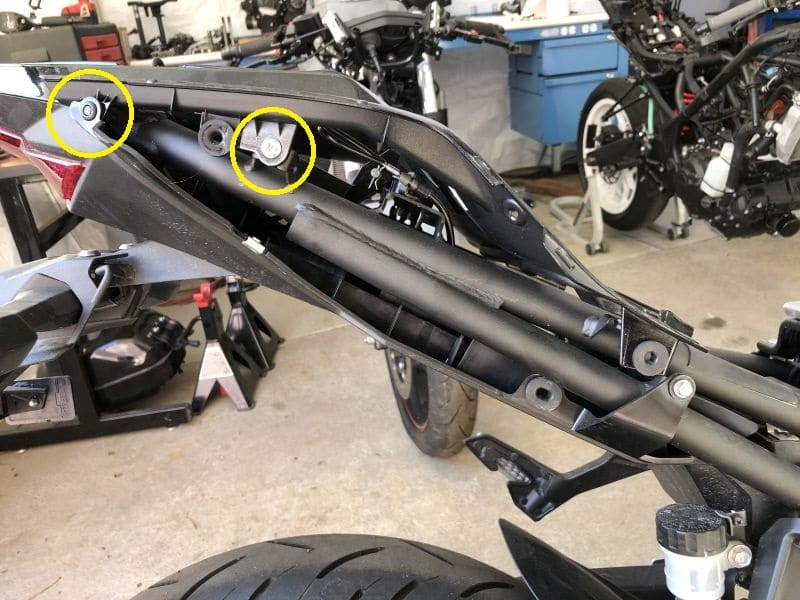
The top of the tail will now come free:

Removal of side front panels
Start by popping out the plastic pin clips near the radiator You will find several all along the inner panel
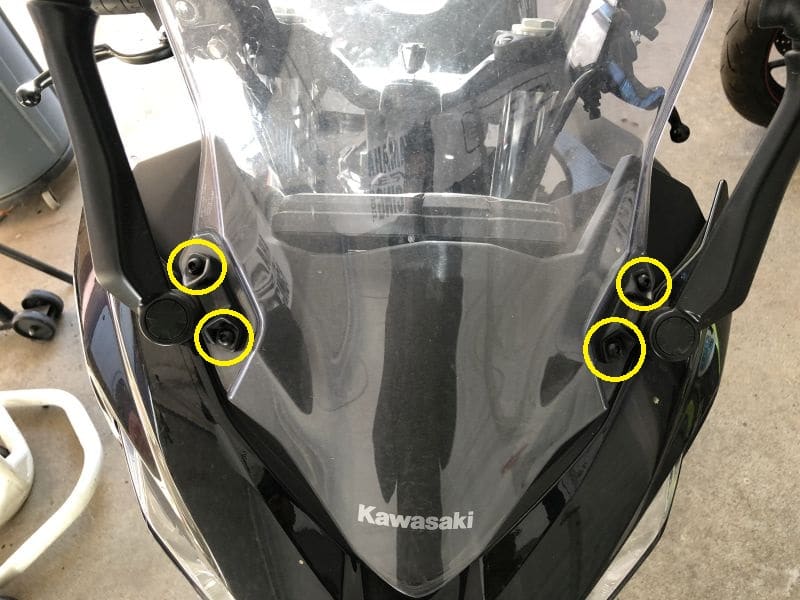
Now remove the 4 bolts holding the mirrors and remove the mirrors
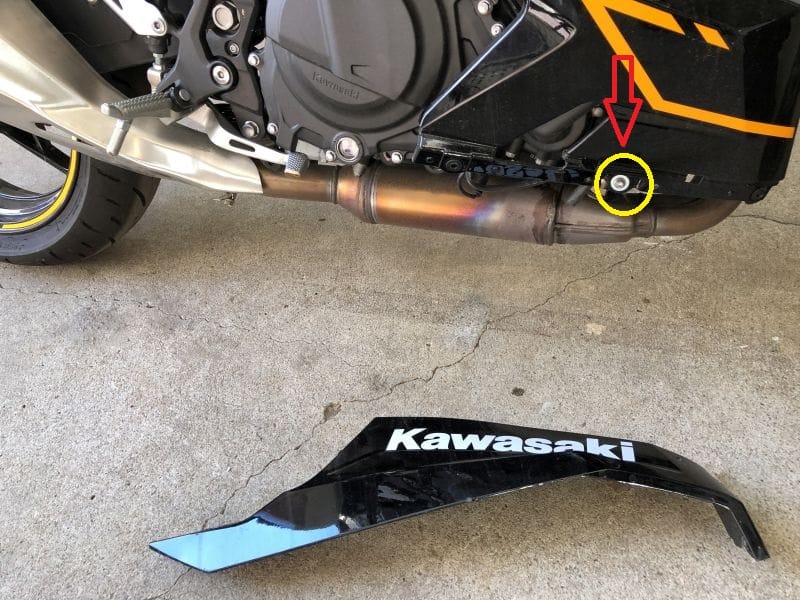
Let’s move down to the bottom belly pan bolts, remove these three from each side and remove the lower plastic sections:

This will expose another bolt that needs to be removed:
Now let’s go back to the top and remove this bolt on both sides